A Responsive Blogger Website, That Take my blog to the next level.

I am a Software Developer, Learning and experementing with .Net Technology and try to put my Learning altogether here.


We have all sections related to .Net Technology, like .Net-C#, Asp.Net, MVC, jQuery, AngularJs, Sharepoint. Find out more...


Following are the some of the Advantages of using this Web site :-

  • Get Update about latest in .Net world.
  • Collection of Useful, Frequently used .Net Solutions.
  • It’s beautiful on every screen size (try resizing your browser!)
Showing posts with label Blogger. Show all posts
by · No comments :

How to Fix Annoying Cursor Jumping Problem While Typing Documents in Laptops?

Chandan Kumar
shared this article with you from Inoreader
Via askvg.com
Today I'm going to talk about one of the most irritating, annoying and frustrating problems I have ever encountered while using laptops. The problem occurs while typing some text. It doesn't matter what and where are you typing, you might be typing in Microsoft Word or a web browser or anywhere else. When you are typing some text, the mouse cursor automatically jumps to a different location and if you don't notice it and keep typing, you may end up with an unpredictable document which might look written in an alien language.
In past I was using Dell XPS 1530 laptop and I never faced such problem but when I got another laptop Dell XPS M15, I started having this annoying problem. I double-checked that my hands were not touching the touchpad accidentally. In fact I tried to type some text while looking at the keyboard and touchpad and still the cursor jumped to a different location.
First I thought that its a problem in my laptop but then I searched on Internet, I found there are many people who have faced the same problem while using a laptop with touchpad. Most of them were using laptops of Dell, HP or Sony.
So its definitely a problem present in some laptops and not in your hands. So what's the solution? How to fix this annoying cursor jumping problem?
Here is the answer! I found that a freeware "TouchFreeze" can fix this problem. It has been suggested by lots of people in Microsoft communities as well.
TouchFreeze is a free software which automatically disables the touchpad of your laptop as soon as you start typing. Since the touchpad is disabled, the cursor will not jump automatically while typing.

TouchFreeze.png

You just need to install the software and it'll sit in system tray. Its very simple to use and doesn't need any configuration. If you want to close it, you can right-click on its icon in system tray and select exit option.
If you are using a laptop and facing similar problem, you can give this freeware a try using following link:
Download TouchFreeze for Windows

UPDATE:
Windows 8 and later operating systems come with a built-in option to prevent accidentally moving cursor while typing. You can find this option in PC Settings (Metro Control Panel).
1. Open Charms Bar by moving your mouse cursor to top-right or bottom-right corner of screen and then click on Settings option.
2. Now click on "Change PC settings" option given at the bottom.
3. It'll open Metro Control Panel or PC Settings page. Now go to "PC and devices -> Mouse and touchpad".
4. Now you just need to change the value of "To help prevent the cursor from accidentally moving while you type, change the delay before clicks work" option. First change its value to "No delay (always on)". If it doesn't work for you, try to change its value to "Long delay".

Stop_Accidentally_Moving_Cursor_While_Typing.png

It should permanently disable the annoying cursor jump problem.
Have you also faced this problem while using a laptop? Feel free to share your experience in your comment...

Read More
by · No comments :

How to use IFTTT to automate your online life - Part 2

How to use IFTTT to automate your online life

These are a dozen of the tastiest IFTTT recipes on the Web, and each shows just how handy-dandy the service can be when you take the time to craft some truly useful triggers and actions.
If you click the "Use Recipe" link on a given recipe's page, it will be added to your collection and automatically activated. Yum. Even if you don't want to use third-party recipes, seeing how other people set up their triggers and actions can serve as inspiration when you're creating your own. (Note: the "captions" below link to the described recipe's page.)


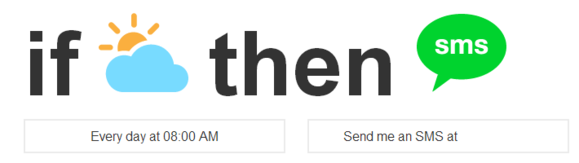
Have IFTTT send you a text message with today's weather forecast every day at 8:00 A.M.


Change your Twitter profile picture when you change your Facebook profile picture.


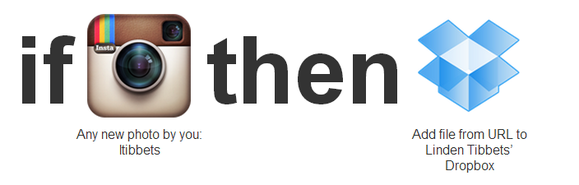
Save all photos that you post to Instagram to Dropbox.


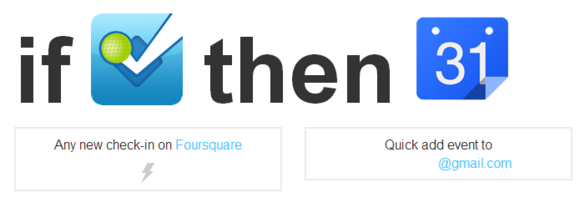
Dear diary: Create a Google Calendar event whenever you check in to a location on Foursquare.


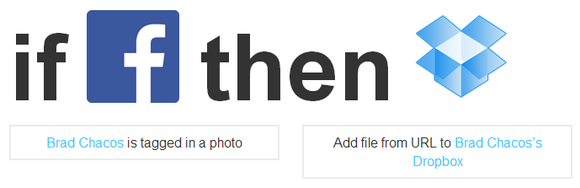
If someone tags you in a Facebook picture, save that picture to Dropbox (or to SkyDrive).


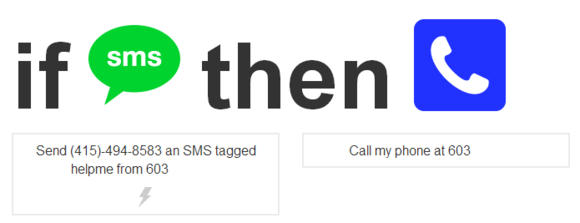
The escape plan: Have IFTTT send you a diversionary call when you text the service. (Alternatively, have IFTTT call you when you send it a message via Google Talk.)


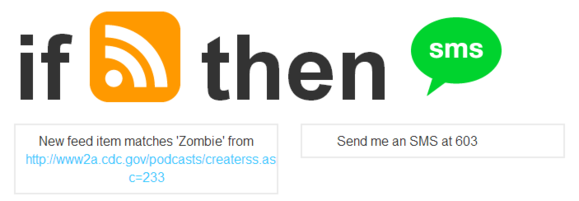
Have IFTTT text you if the Center for Disease Control reports a zombie outbreak.


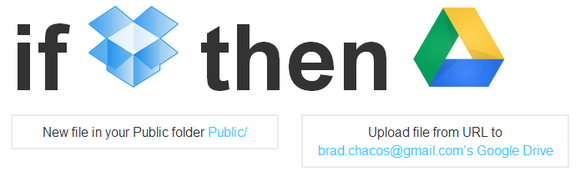
Back up your Dropbox files in Google Drive.


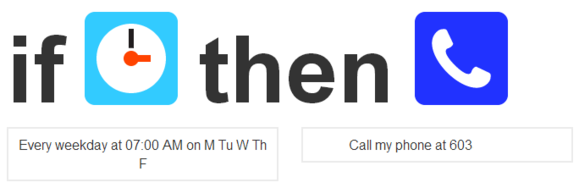
Receive a daily wake-up call.


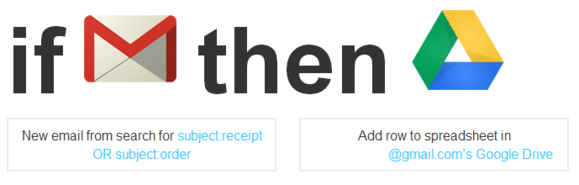
Automatically track online purchase receipts received via Gmail on a Google Drive spreadsheet.


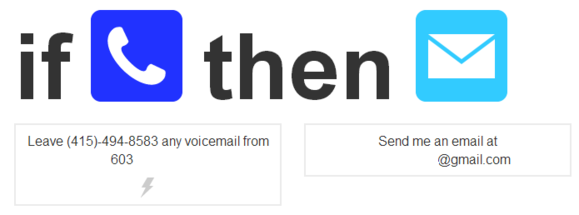
Dictate a voice message to IFTTT and receive a transcription in your inbox.


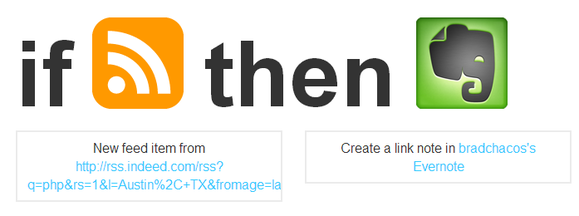
You can even go super-niche and do stuff like scrape specific job feeds in specific markets and send the results to a specific Evernote notebook.
I could go on, but I think you get the point. You can search through all of IFTTT's shared recipes via the "Browse" link at the top of the website, or through the most popular recipes here.

Editing a recipe

So, you've got a full plate of homemade and cribbed recipes. What if some of them don't taste quite right? That's where IFTTT's editing options come in.
The quick option icons for a recipe are to the right of the task itself on your My Recipes page.
If you head to your My Recipes page, you'll find a list of all your concoctions. Next to each one, you'll see a line of icons to quickly deactivate, delete, or share your recipes—each does exactly what you'd expect. Deactivated tasks appear grayed-out.

The expanded option interface; the Trigger and Action fields lie below the fold on the IFTTT site.
Clicking on the recipe itself or on the sideways triangle next to the share icon brings up a complete list of options for that particular IFTTT recipe. Here, you'll find a few new icons. One shows the activity for the recipe, detailing exactly when the recipe's trigger has been tripped and acted upon; the other button, "Check," lets you see if the recipe is still working to ensure that it hasn't broken in some way.
Scrolling down, you'll find the Trigger and Action fields for the recipe, which let you tinker with the fine details. You can't, however, change higher-level triggers or actions through the options interface. If, say, you want your Instagram pictures to start saving to SkyDrive instead of Dropbox, you'll have to create a whole new recipe.

A universe of possibilities

Now, young IFTTT padawan, you have all the knowledge necessary to become a true IFTTT Jedi. Sure, the service may be a bit simple, but its easy-to-use interface is still capable of pulling off impressive feats of power—especially if you start mashing the service together with some custom Yahoo Pipes or the cornucopia of Dropbox, Google Drive, and Evernote extension s out there.
How do you use IFTTT? Share your suggestions—or, better yet, your recipes—in the comments below.


Read More
by · No comments :

How to use IFTTT to automate your online life - Part 1

How to use IFTTT to automate your online life
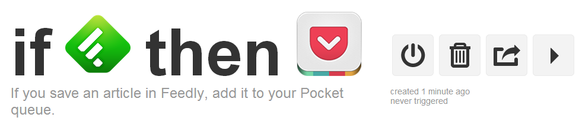
You may think of the Web as a big tubular mesh of interconnectedness, but really, apps and sites tend to be more like islands than Kumbaya-singing cooperative circles. Evernote doesn't seamlessly save your notes to Dropbox. The Facebook photos you're tagged in don't automatically post to your Flickr account. Articles you save in Feedly don't push themselves to Pocket for later reading.
As explained below, IFTTT changes all that, bringing your various Web-service ingredients together into a smart, automatic, and, above all else, connected Internet stew. Yes, IFTTT makes the Web both scrumptious and ridiculously powerful, and we're going to show you how to brew up some deliciously useful recipes, as well as highlight some awesome IFTTT tasks that others have already created.

If this, then that—what it is

The secret sauce is foretold in the name: IFTTT is short for "If this, then that," and the core building blocks of the service are based around that simple, cause-and-effect relationship. A trigger event happens, and a resulting action occurs. One example of a potential recipe: If you like a photo on Instagram, then IFTTT automatically saves that photo to the Dropbox folder of your choosing. You get the idea.
Before you start dabbling in recipes, however, you'll have to head over to IFTTT.com to create an account and connect some channels to that account.

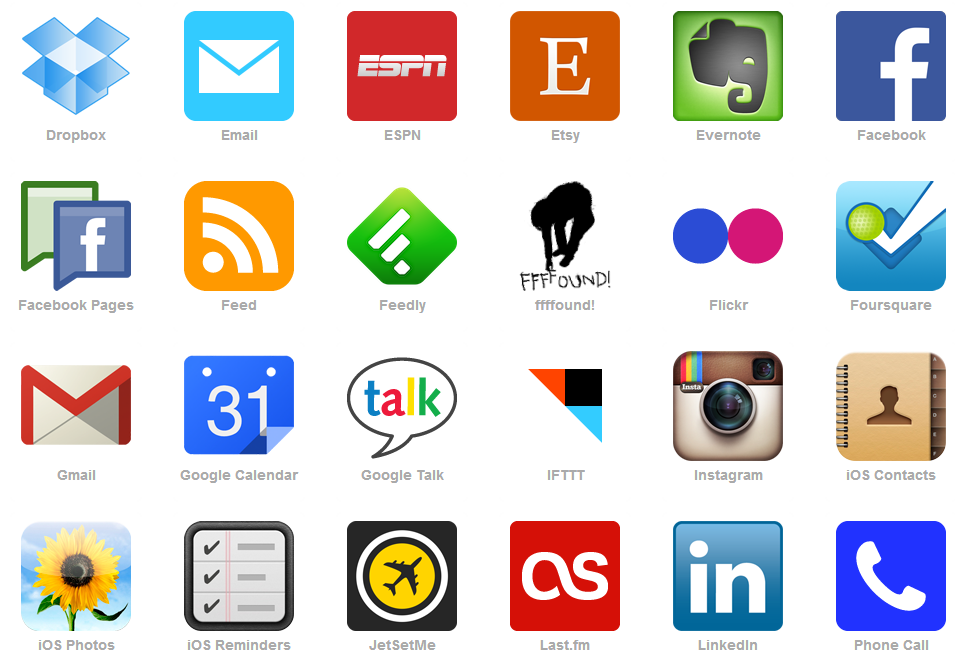
A small taste of the many IFTTT channels available.
"Channel" is IFTTT parlance for a Web service or other action. IFTTT currently supports 67 different channels spanning a wide range of popular services, and it can perform basic actions such as calling or texting a phone, or sending you an email.
Here's a list of all the available IFTTT channels. You may recognize some of them: Craigslist, Dropbox, Evernote, Facebook, Flickr, Foursquare, Instagram, SkyDrive, Twitter, YouTube, and a wide range of Google services are just the tip of the iceberg. A newly released iPhone IFTTT app even adds channels for your phone's Reminders, Contacts, and Photos apps. (Here's hoping an Android version is barreling down the pipeline.)
Once you've gone through and activated some channels—basically, granting IFTTT access to your various services or providing it with personal details—you're ready to start crafting. Let the mad science begin!

Pulling the trigger


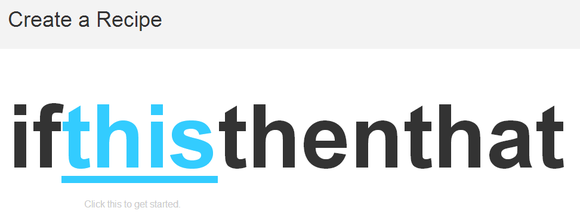
Open the My Recipes tab at the top of the IFTTT website and click the big blue "Create a Recipe" button to start. You'll see the text above appear onscreen; click the "this" link as prompted.


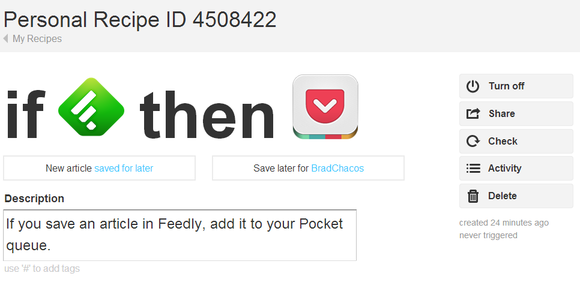
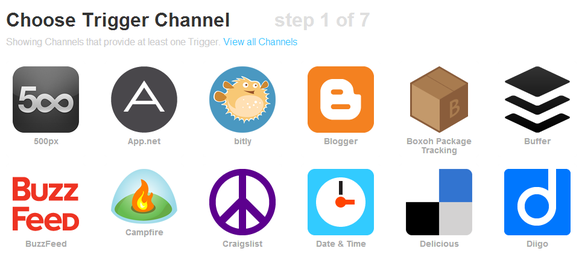
The process is pretty straightforward, and IFTTT does a good job of walking you through it. We'll use a simple example as we go along. Select a channel to serve as the "Trigger"—a chosen service that kicks off the cause in your cause-and-effect IFTTT recipe. (If you choose a channel that you haven't activated, you'll be prompted now to do so.) For this example, I'll use Feedly, the awesome Google Reader alternative.


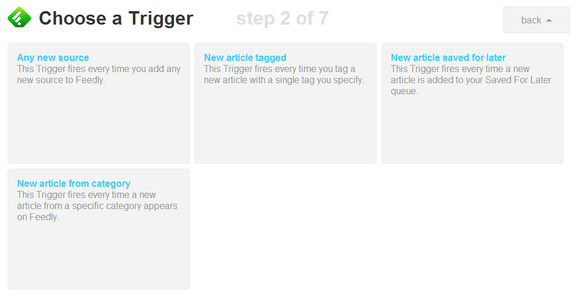
Next, you'll be presented with a list of specific trigger events available for the channel. Trigger events are the actions that set the IFTTT recipe into motion. For example, with Feedly I chose "New article saved for later." Whenever I save an article in Feedly (the cause), the rest of this recipe will occur (the effect).


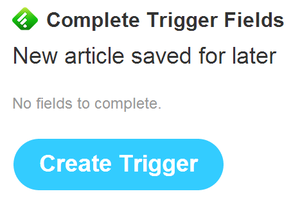
The third step lets you add specific trigger fields. These fields let you narrow trigger events down to very specific occurrences, such as using the Feed channel to monitor a single RSS feed. Once you've set that up (or not, in the case of a trigger-field-less event such as the Feedly example), click the big "Create Trigger" button.
Boom! You're halfway done.

Arranging the consequences


Now, you have to set up what happens when a trigger event is tripped. So I saved an article in Feedly—now what?
Click on the blue "that" link to continue. As with the trigger, your first step toward setting up a subsequent action is choosing a channel. In this example, I'll pick Pocket, a.k.a. The Service Formerly Known As Read It Later.


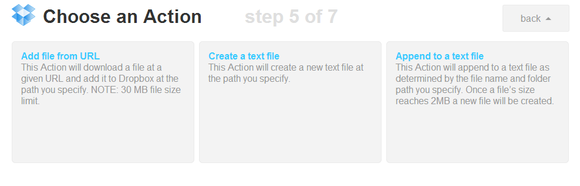
With Pocket, your Action choices are about as limited as limited can be, but other services offer much more varied Action options. For example, Dropbox (shown above) can save files to the folders of your choosing or create a new text file when trigger events fire. IFTTT's Facebook Action options include the creation of new status messages, link sharing, or even photo uploads from predetermined locations.


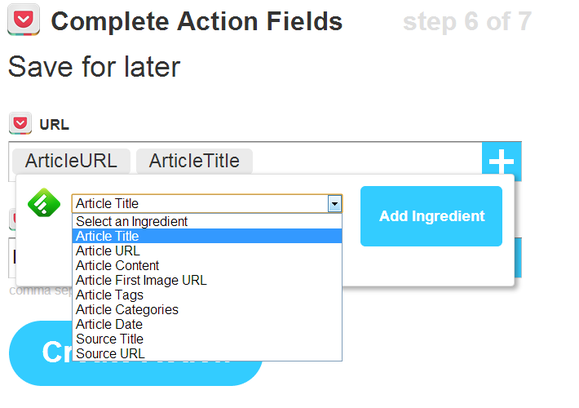
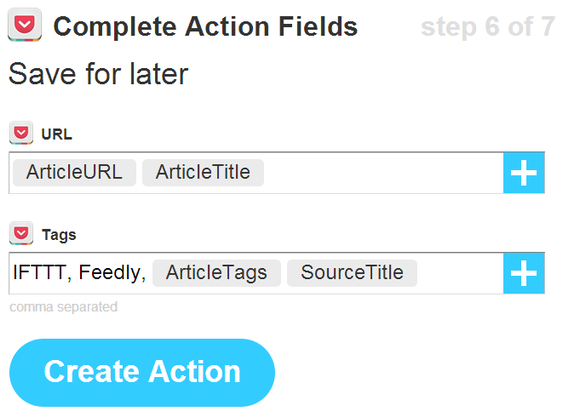
Finally, we've reached the Action Fields screen, where you can fine-tune the outcome of your recipe (if the channel supports it), tweaking the aforementioned folder paths and file URLs and whatnot. IFTTT is pretty smart: The default setting is usually a sound one.


I've decided that any articles I save in Feedly should appear in Pocket with their URL and headline, and I want to list those articles with some predetermined tags for easy sorting.


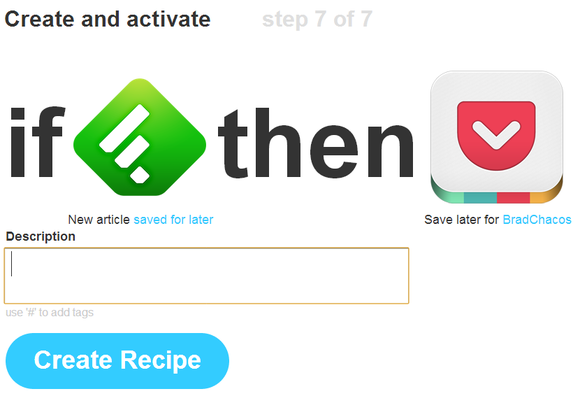
On the final screen, you'll have a chance to go over your handiwork. Don't forget to add a description! You won't be able to see the trigger/action notes when you're glancing at your main Recipes page—only the icons for the services and the description you've written.
And with that, the IFTTT recipe is complete. In my case, any article I save to Feedly is now automatically pushed to Pocket for later reading, with no manual muss or fuss on my end. IFTTT does all the heavy work behind the scenes, checking for new trigger events every 15 minutes.

Taking notes and swiping recipes

The Feedly example may be simplistic, but with a little imagination and some concurrently running recipes, IFTTT can become insanely powerful. Don't take my word for it: Let's take a peek at some of the more interesting recipes IFTTT users have shared. Better yet, let's try some out—jump to the next article.


Read More
by · No comments :

Allow log on locally, - add new user greyed out. Fix via Domain Controller Policy Settings

Windows Several 2012.

So here's the issue, in a Windows 2008 Server R2 VM, I created some new users in AD, but I still couldn't log in as them.  So I tried to add them to "Allow log on Locally" via local properties but the ability to add new users here was greyed out.  Sad Face.

LogonLocal1

According to the Google machine I had to update this information in the Domain Controller Policy not the Local Security Policy.  Well Domain Controller Policy is not as easy to find as one might think

1) Go to Administrative Tools -> Group Policy Management

2) Navigate down through the tree… Forest: Current Domain -> Domains -> CurrentDomain.loc -> Domain Controllers -> Default Domain Controllers Policy

LogonLocal2

3) Right click Default Domain Controller Policy and select "Edit", this will bring up the Group Policy Management Editor, with "Default Domain Controller Policy" tree loaded

4) Navigate through the tree again… Computer Configuration -> Policies -> Windows Settings -> Security Settings -> Local Policies

LogonLocal3

5) Click on "User Rights Assignment" in the tree and then double click on "Allow log on locally" in the right window

6) Now you can add your users! So add whoever is needed, click OK and then we have 1 more step.

7) We now need to push the group policy out everywhere.  So open the command prompt and run "gpupdate /force"

Now you should be able to log on as your new users!!

Inoreader is a light and fast RSS Reader. Follow us on Twitter and Facebook.
Read More
by · No comments :

Floating Horizontal Social Media Share Buttons For Blogger | Widget.

Floating Horizontal Social Media Share Buttons For Blogger | Widget.

Horizontal Share Bar

You can position horizontal share buttons in a "floating bar" that is commonly docked to the bottom of the user's screen, particularly on mobile devices.
The following example displays a horizontal share bar that is docked to the bottom of the user's screen on the right side. The current page uses this style.
<div class="a2a_kit a2a_kit_size_32 a2a_floating_style a2a_default_style" style="bottom:0px; right:0px;">      <a class="a2a_button_facebook"></a>      <a class="a2a_button_twitter"></a>      <a class="a2a_button_google_plus"></a>      <a class="a2a_button_pinterest"></a>      <a class="a2a_dd" href="https://www.addtoany.com/share"></a>  </div>    <script type="text/javascript" src="//static.addtoany.com/menu/page.js"></script>  
The following example displays a center-aligned horizontal share bar that is docked to the bottom of the user's screen. Center alignment is done by specifying a left position value of 50% and a negative margin-left value that is equal to the total width of the icons. The width of these default icons can be calculated by multiplying the number of icons by 40. For example, 5 icons (multiplied by 40) gives a margin-left value of -100px.
<div class="a2a_kit a2a_kit_size_32 a2a_floating_style a2a_default_style" style="bottom:0px; left:50%; margin-left:-100px;">      <a class="a2a_button_facebook"></a>      <a class="a2a_button_twitter"></a>      <a class="a2a_button_google_plus"></a>      <a class="a2a_button_pinterest"></a>      <a class="a2a_dd" href="https://www.addtoany.com/share"></a>  </div>    <script type="text/javascript" src="//static.addtoany.com/menu/page.js"></script>  

Responsive Floating Share Buttons

Using CSS media queries, you can specify mobile/desktop breakpoints for responsive floating share buttons. For example, it is common to hide a "docked" vertical share bar on the smaller screens of mobile and tablet devices.
<style type="text/css">  /* Hide AddToAny vertical share bar when screen is less than 980 pixels wide */  @media screen and (max-width: 980px) {      .a2a_floating_style.a2a_vertical_style { display: none; }  }  </style>

After you've selected your choice. Just follow the steps below to apply this widget to your blog.

1. Go to Blogger
2. Click the Blog, you want to add the widget to.
3. From the dashboard, click Layout.
From the Pop window click Add a Gadget, a new window will pop up, from the pop up window click - HTML/Javascript.
4. Paste your code into the new pop up window Content Space and click save.

Then, you have your choice Floating Share button on your blog.


Read More
by · No comments :

RC Transfer Process, Fees, Documents, Forms to Buy Sell Used Car

RC Transfer Process, Fees, Documents, Forms to Buy Sell Used Car

Are you looking to buy or sell Used Car. Know RC Transfer Process with Documents and Fee Charges

RC Transfer Process

Before Buying or Selling Used Car, its imperative to know how ownership transfer happens with documents, transfer charges with Process note from both buyer and seller perspective.
» Original RC Copy Book needs to be submitted. If RC Book has HP to any Bank / Financier, then NOC along with RTO Form Number 35 is required to be submitted. Note: Generally NOC is Valid for 60 days from date of issuance.
» RTO Form Number 29, 30 are considered Sale Transfer Forms. This needs to be signed by both Seller and Buyer with 2 Copies required
» Vehicle Chassis Number Imprint
» Notarized Copy of Insurance, PUC Certificate, ID & Address Proof of both Buyer and Seller (Seller Address Proof on RC should match as with Present Address else an affidavit is required)
» Notarized Copies of PAN Card of Buyer or Form 60,61
Download: RTO Forms

FAQs on RC Transfer

» Generally the Seller is not required to be present in Person in RTO Office for transfer of vehicle. However, where the Signatures mismatch or case seems doubtful to RTO Officer - in those cases only the Seller is also called to be present in RTO Office with ID Proof along with Buyer for Verification Purpose, to avoid any fraudulent / stolen / ID theft Transfer.
» In Terms of Time Taken for Used Car RC Transfer - If Transfer Forms and Documents are submitted - it does not take more than 2 weeks to get Transferred RC from RTO
» As matter of caution, the seller can submit Form TCR within 2 Weeks which is a transfer intimation to RTO Office after sale of vehicle along with Copy of ID & Address Proof of Buyer
» Standalone Rent Agreement, Credit Card Statement, Private Bank Statement, Appointment Letter of Private Company - are not considered address proof for effecting transfer in name of buyer

RC Transfer in Case of Buying Car in Different City, but within Same State

Additionally :- NOC Clearance Certificate from first RTO where vehicle was initially registered. This however is a simple format application signed by RTO Officer of the original RTO . For eg :- Noida car getting re-registered with Ghaziabad number. (Not Applicable in All States / UTs)
* - Valid Address proof is the address proof as per prescribed documents of RTO - viz electricity bill/ nationalized bank a/c statement / election card / water bill / gas connection etc

Inter State RC Transfer

Sometimes Buyer belongs to one state and seller to other, in this case Transfer Process goes on like. Other than the Documents mentioned above in RC Transfer Process - in case of Inter State transfer, additional documents are :-
- NOC From Traffic Police for No Offence, Dues
- NOC from NCRB (National Crime Record Bureau) that Vehicle is not Stolen, can be done Online - Click Here to Obtain
- Clearance Certificate required to be Issued from Original RTO where car was Initially Registered.
- A Copy of Clearance Certificate from RTO and NCRB Noc needs to be retained - which needs to be submitted to the New RTO Office.
- Form 27 and Form 28 for No Objection Certificate of Inter State Transfer of Vehicle
- Form 20 for Re Registration of Vehicle. Also - Form 29,30 as Sale Transfer Forms needs to be signed by seller
- Vehicle Fitness Certificate issues by RTO Inspector
- Valid Notarized ID & Address Proof of New Owner
- Insurance Cover Note or Policy with Engine Number & Chasis Number
- Applicable Re-Registration Fees, based on Depreciated Value as per Ageing Value of Car carried as per respective RTO Officer
- In some States, Only BS-IV / Euro IV vehicles are getting registered in inter state due to latest emission norms (one need to check with local RTO office for same)
However, if you yourself is migrating to another city (say from Delhi to Mumbai), due to transferrable job or for some other reason and you intend to keep vehicle with you - but want to re-register in new state. Know Related Topics: Vehicle Re Registration Process


Important Documents to Check Before Buying Used Car
The Registration Certificate is like Ownership Proof and is must required to be submitted while Selling Car transferring car Inter State or in Same State. Its the most important document
« Check Owner Name, Address and Owner Serial Number of the Car. Does Name & Address matches with ID Proof and Address Proof of Seller
« Match the Engine Number and Chassis Number with the Latest Insurance Policy. Ensure that Insurance should be Valid on Date of Transfer. Expired Insurance Policy will not effect transfer
« Check Hypothecation in RC. If the car is HP to any Bank, do demand for NOC prior to sale. If Loan is Active - do insist for Foreclosure Charge Statement as on date and have this recorded in sale agreement with the seller
« If Car Fitted with CNG Kit, ensured its endorsed in both RC and Insurance

Transfer Fees

There are no Road Tax or Re-Registration Charges to be paid in case of Transfer within same State. Only Required are :-
« Transfer Charges - which is like Endorsement for issuance of New RC in buyer name. Official transfer charges are Rs. 250 in most of the RTO Office
« Bank HP Deletion (if Hypothecation on RC) - Rs. 110
« New RC Smart Card Issuance - For issuance of New Smart Card, Charges are around Rs. 400 - 450
Process Note Valid in :- Above Process Note is almost Valid in all Cities, States or Union Territory of India. From Andhra Pradesh, Maharashtra, Haryana, Goa, Gujarat, Karnataka, Punjab, Tamil Nadu, Orissa, Rajasthan, New Delhi, Chandigarh, Kerala etc.


Read More
by · No comments :

Bing Rewards now in #India, with @FreeCharge redeem coupons

Bing Rewards now in #India, with @FreeCharge redeem coupons
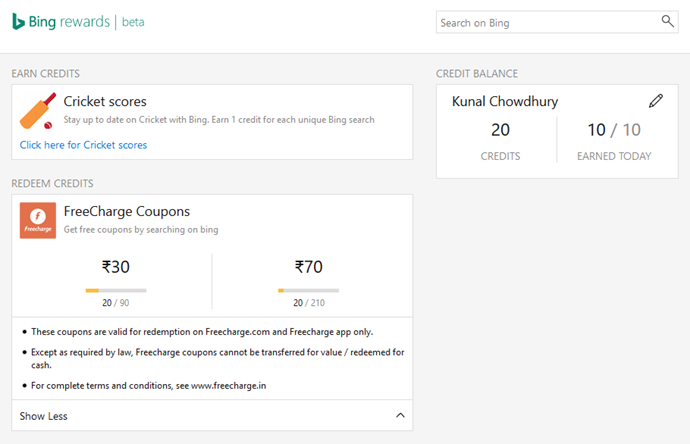
Bing Rewards program can help you to earn credits for searching on Bing or trying new features from Bing or other Microsoft products and services, which can be redeemable for a variety of gifts and other rewards. If you are in India, now you can register for it (which is free) and start rewarding yourself by just searching on Bing.com.
If you are new to this, checkout the blog posts and register for this free program. Start searching on Bing, start earning some rewards just for your searches.


Bing Rewards now available in India, having FreeCharge coupons in rewards list (www.kunal-chowdhury.com)

How to register?

To sign up for Bing Rewards you need to have a Microsoft account. You can use an existing Microsoft account or create a new one. The information related to your participation in Bing Rewards, including the number of searches you do, is stored in connection with the Microsoft account you signed-in with. You can sign up using a phone number or a valid email address.
To sign-up to Bing Rewards beta program or to see your earned credits, visit: https://www.bing.com/rewardsintl/dashboard. Make sure that, you set up your region properly in the settings page of the site.


Bing Rewards now available in India, FreeCharge coupons as redeemable gifts (www.kunal-chowdhury.com)


Once you join, Microsoft will award you 10 credit points as joining bonus. Then you can start searching on bing.com and start accumulating the points. Microsoft has tied up with FreeCharge.in for rewarding you with some coupons, as part of marketing/promotion. These coupons are valid for redemption on freecharge web app only. For complete terms and conditions, see www.freecharge.in.

If you have come this far, it means that you liked what you are reading. Why not reach little more and connect with me directly on Twitter, Facebook, Google+ and LinkedIn. I would love to hear your thoughts and opinions on my articles directly. Also, don't forget to share your views and/or feedback in the comment section below.


Read More
by · No comments :

Increase Your Adsense Earning by Blocking Low Paying Ads - EarnGurus


Via Web page

Increase Your Adsense Earning by Blocking Low Paying Ads

For AdSense users, I have a nice method to increase your Adsense earning by blocking low paying Ads. AdSense is the best way of making money online, but it is not an easy way to make money from Adsense. We spend time for create a niche blog or website and also post good articles for more and more visitor but when we get low earning or CPC from Adsense then we feel very bad.
So I have a legal and easy method to increase AdSense earning by the blocking low CPC ads. When you will block low CPC ads on your Adsense account then high CPC ads will be showing in your blog that mean your earning will increase.

Why Your Adsense CPC is Going to Low?

There are several advertisers for the same keyword. Some advertisers bid High CPC, but some of them pay very low bucks to the publishers for the same keyword. Some ad bid may give you only 0.01$ per click which are considered under the low CPC ads. In this case, your Adsense earning might be lower if your blog shows such ads with low CPC.

How to Increase Adsense Earning?

If your blog or website have good traffic, but your CPC or Adsense earning very low that mean your blog is getting very low CPC ads. It is the main reason for low earning. So you need to block those ads who gives you very low CPC.

How to Block Low CPC Ads?

If you want to increase your Adsense earning by blocking low paying Ads then you need to just follow the steps:
1. Login to your Google AdSense Account
2. Click  on allow or Block ads.

Increase Your Adsense Earning by Blocking Low Paying Ads

4. There you can find several option to block low CPC ads.if want to block low CPCAdvertiser URLs then you can add those URLs

Increase Your Adsense Earning by Blocking Low Paying Ads

  • Click on Advertiser URLs
  • Type URLs you want to block
  • Click on Block URLs button
5. You can Block Ads by the categories

Increase Your Adsense Earning by Blocking Low Paying Ads (2)

I have some low CPC ads URLs you can block all of them
1s.md
1st-free-article.com
1st-home-business.com
1st-lingerie.net
1st-portal.net
1step1.info
2020ok.com More are HERE
It is a very easy method to increase your Adsense earning by blocking low paying ads. After changing all settings, it will take some time to increase your earning. It will help you to increase your CPC and your earning will be high. If you have any problem to do this setting feel to free comment here I will help you.

Read More
by · No comments :

How to Embed PDF, DOC, XLS Files Into Blogger

Chandan Kumar
shared this article with you from Inoreader
Via Web page
Posted by : Ravikant verma
Hello friends, Due to my exam i was unable to post a single post, So I'm really sorry for this. In today's post I will tell you how you can embed PDF, DOC, or XLS files into blogger blog. This post is also described How to show PDF, DOC or XLS files on blogger without using third party or services. Blogger is a free blogging platform by Google and there are some limits, you cannot upload pdf, doc, xls files directly. So before we used third party websites or hosting services to embed these files. But now you don't need to go to third party websites, you can embed  your PDF, DOC or XLS files using Google Drive, Google drive is a free cloud storage service by Google. So, without wasting a time let's come to the tutorial.

How to Embed PDF, DOC, XLS Files Into Blogger post

How to Show PDF, DOC, XLS files on Blogger 

  • At first, Go to the drive.google.com and login with your existing account or create a new one.
  • Now upload your PDF, DOC or XLS file, After upload completed click on the uploaded file link. It opens in new tab

Uploading.jpg
  • In the new tab click on share and change the properties of sharing 'Private' to 'Public' or 'Anyone with the link'.


Anyone+1.jpg
  • Now, go to File > Embed (this PDF file) in menu bar.


Embed+as+PDF.jpg
  • Now, Embed code will pops-up just copy that code and paste it on Edit HTML mode in blogger post editor.


Embedcode.jpg

Popular Posts

Recommended Posts

View on the web
Inoreader is a light and fast RSS Reader. Follow us on Twitter and Facebook.
Read More
by · No comments :

How to Add Breadcrumb for blogger blog

How to Add Breadcrumb for blogger blog
All of us might have seen breadcrumbs on most wordpress blog.
So why not implement a breadcrumb for the blogger blogs.. For those who don't know what a breadcrumb is,here is a little defenition from wikipedia.
Breadcrumbs or breadcrumb trail is a navigation aid used in user interfaces. It gives users a way to keep track of their location within programs or documents. The term comes from the trail of breadcrumbs left by Hansel and Gretel in the popular fairytale.
The trails like Home >> Label >> Post Name are the breadcrumbs.
So Now lets get Started :
  1. Login to your blogger dashboard
  2. Go to Layouts and then Edit HTML
  3. Then I would Sugguest you download the whole template first then Continue Editing.
  4. Now find for this Code :
    <b:include data='top' name='status-message'/>
  5. Now Replace it with the below code :
    <b:include data='top' name='status-message'/> <b:include data='posts' name='breadcrumb'/>

  6. Now Find :
    <b:includable id='main' var='top'>
  7. Now Replace the above code with below code :
    <b:includable id='breadcrumb' var='posts'> <b:if cond='data:blog.homepageUrl == data:blog.url'> <!-- No breadcrumb on home page --> <b:else/> <b:if cond='data:blog.pageType == "item"'> <!-- breadcrumb for the post page --> <p class='breadcrumbs'> <span class='post-labels'> <a expr:href='data:blog.homepageUrl' rel='tag'>Home</a> <b:loop values='data:posts' var='post'> <b:if cond='data:post.labels'> <b:loop values='data:post.labels' var='label'> <b:if cond='data:label.isLast == "true"'> » <a expr:href='data:label.url' rel='tag'><data:label.name/></a> </b:if> </b:loop> <b:else/> »Unlabelled </b:if> » <span><data:post.title/></span> </b:loop> </span> </p> <b:else/> <b:if cond='data:blog.pageType == "archive"'> <!-- breadcrumb for the label archive page and search pages.. --> <p class='breadcrumbs'> <span class='post-labels'> <a expr:href='data:blog.homepageUrl'>Home</a> » Archives for <data:blog.pageName/> </span> </p> <b:else/> <b:if cond='data:blog.pageType == "index"'> <p class='breadcrumbs'> <span class='post-labels'> <b:if cond='data:blog.pageName == ""'> <a expr:href='data:blog.homepageUrl'>Home</a> » All posts <b:else/> <a expr:href='data:blog.homepageUrl'>Home</a> » Posts filed under <data:blog.pageName/> </b:if> </span> </p> </b:if> </b:if> </b:if> </b:if> </b:includable> <b:includable id='main' var='top'>
  8. Now Find ]]></b:skin> and replace it with the below code :
    .breadcrumbs { padding:5px 5px 5px 0px; margin: 0px 0px 15px 0px; font-size:95%; line-height: 1.4em; border-bottom:3px double #e6e4e3; } ]]></b:skin>
Now you should have a working breadcrumb navigation on your system.

Note: Click on my any post, you will see the breadcrumb.

Read More
by · No comments :

How to put a gadget into a post in Blogger


Via Web page
This article describes how to put a gadget into a blog post / page - or at least how to make it look like you have done so.

Gadgets and Blog-posts


widget-into-blog-post-or-page-in-blogger
Previously, I've explaiend how to add a gadget to your blog. In that post, I said that the only place where you could put a gadget was one of the areas defined by your template - basically the header, footer or sidebar.
For gadgets where you get the HTML or Javascript code from somewhere else, it's easy to add the code to a post - see adding code from external sources to your blog for more information.  But for gadgets from the Add a Gadget list, there is no way to do this.
But it's fairly easy to make it look like you have put a gadget into a post or page, provided you're willing to accept the risks of editing your template.
The way to do this is by putting the gadget below the blog-posts area, putting any further post-content into another HTML-gadget under this, and then setting both of these up to only show on the specific post or page that you want the gadget to be "in".
While this is tedious, I don't expect the restriction of putting gadgets inside posts to be changed anytime soon.   (Go on Blogger ... prove me wrong!)

gadget-inside-blogger-post-page-example.

Follow these steps to put a gadget into a post or page

1)   Make the post or page
Give it a title, and if there is any content that you want to put above the gadget, then add it now.
2)   Publish the post / page.
If you use a Post, remember that it will go out in your RSS feed - and it could look strange for your subscribers to see a half-written post - make sure that what you'd doing is worth any confusion that this may cause.
And if you use a Page, you may need to adjust the Pages gadget to not show it, depending on what how visitors will access the page.
Despite these side-effects you need to publish the post/page now, before the gadget is added, because you need its address later on.   So take note of the URL of your published post.
3) Add the gadget to your blog in the usual way.
Position it immediately underneath the Blog Posts gadget. Find out the gadget-ID, and keep a note of it.
4) If there is any content that you want displayed after the gadget, then
  • Use the post-editor (or any other tool) to generate the HTML code for this content 
  • Add an HTML/Javascript gadget:  Put the code you made into the Content field, and position the gadget immediately underneath the gadget you added in step 3.
  • Note the ID of this gadget, too.

5)   Set up which page/post your gadget is shown on:
Edit your template.
For both of the gadget-IDs that you noted (the one that's going "inside" the post, and the one that contains the rest of the "post"),  change the template so that they are only displayed on the Page or Post that you created in the first step.
The way to do this is very similar to only showing a gadget on your home page, except that instead of
<b:if cond='data:blog.canonicalUrl == data:blog.homepageUrl'> 
the condition to use is
<b:if cond='data:blog.canonicalUrl == "URL-OF-THE-POST-YOU-MADE"'>>

(If you don't have a custom domain,then make sure that the URL-OF-THE-POST-YOU-MAKE ends with .blogspot.com, not with a country-specific form - unless you want the rule to only work in the specific country.)

How well does it work?

I'm still testing to see how well this approach works, and what gadgets it's most suitable for.  Some, eg the Labels and Followers gadget, are likely to expand to fill the space available.   So will Search - though if it doesn't then it might be as easy to just use a custom-search-engine, which will give you the code.   AdSense gadgets will take the space required for the type of gadget you choose, but again it's probably simpler to just get the code from AdSense and put it into your post directly.
One issue I've found is that the gadget is left-aligned, and there is no way to make the "post" text flow around it if it doesn't take the e ntire post-width.
It may be possible to centre the gadget within the post, by putting this code around in in the template:
<div style='text-align: center;'>
<b:widget id='XXXn' locked='false' title='YOUR-GADGET-TITLE' type='Text'/>
</div>

That said, I haven't tried this yet, and there may be some extra things to think about here.   Let me know if it doesn't work, and I'll try to find a way to solve any problems.


Inoreader is a light and fast RSS Reader. Follow us on Twitter and Facebook.
Read More